If your knee complains on the stairs or your shoulder dislikes a familiar press, planning a workout can get complicated. Start by finding out which movements fit your current limits.
Strength training over 40 with joint pain needs a better plan than copying a list of “safe” exercises. Start with what is happening, what you have been cleared to do, and which movements you can repeat without making the situation worse.
You can work toward strength and muscle without treating every session like a test of toughness. You also do not have to assume that turning 40 means your joints are worn out.
I’m a coach, not your doctor. Get new, unexplained, worsening, or lasting pain checked by a qualified doctor or physical therapist. They may set limits based on an injury, surgery, or medical condition. Follow those limits before anything in this article.
The examples below are training options to discuss with your coach and, when needed, your physical therapist. They cannot tell you what is causing your pain or replace treatment for an injury.
Rest has a place, but it is not the whole plan
Sometimes you need to stop an irritating activity and let an injury settle. Sometimes your care team will tell you to protect an area. Follow that advice.
For people with osteoarthritis, a common form of arthritis, exercise matched to their needs is a key part of care. NICE recommends strengthening and other exercise matched to the person. That does not mean every painful joint needs more weight or more work today.
The useful question is: “What activity is appropriate right now, and how should I build from here?”
That might mean changing one exercise while keeping the rest of your training. It might also mean getting medical guidance before you lift again.
Start with a two-minute check, not a self-diagnosis
Before choosing exercises, write down four things:
- What bothers you: the movement, location, and when it happens.
- What has changed: swelling, strength, sleep, daily tasks, or symptoms at rest.
- What you already know: a diagnosis, recent injury, and any limits set by your care team.
- What you want back: easier stairs, lifting luggage, gardening, or a regular gym routine.
Use your usual experience. Do not perform painful movements just to collect information.
The Over 40 Movement Scorecard can organize that conversation. It covers areas such as strength, mobility, recovery, and joint confidence. Mobility means how well you can move through a useful range.
The scorecard helps you reflect on daily life. It is not a physical test, medical assessment, or way to identify damaged tissue. You do not need to exercise to complete it.
A low score does not diagnose a problem. A high score does not clear you to train through symptoms.
Bring your observations to a coach for exercise planning. Bring concerns about pain or injury to your doctor or physical therapist. If you already have a care plan, ask which activities are allowed, which symptoms mean stop, and what response is acceptable afterward.
A pain score cannot give everyone the same green light
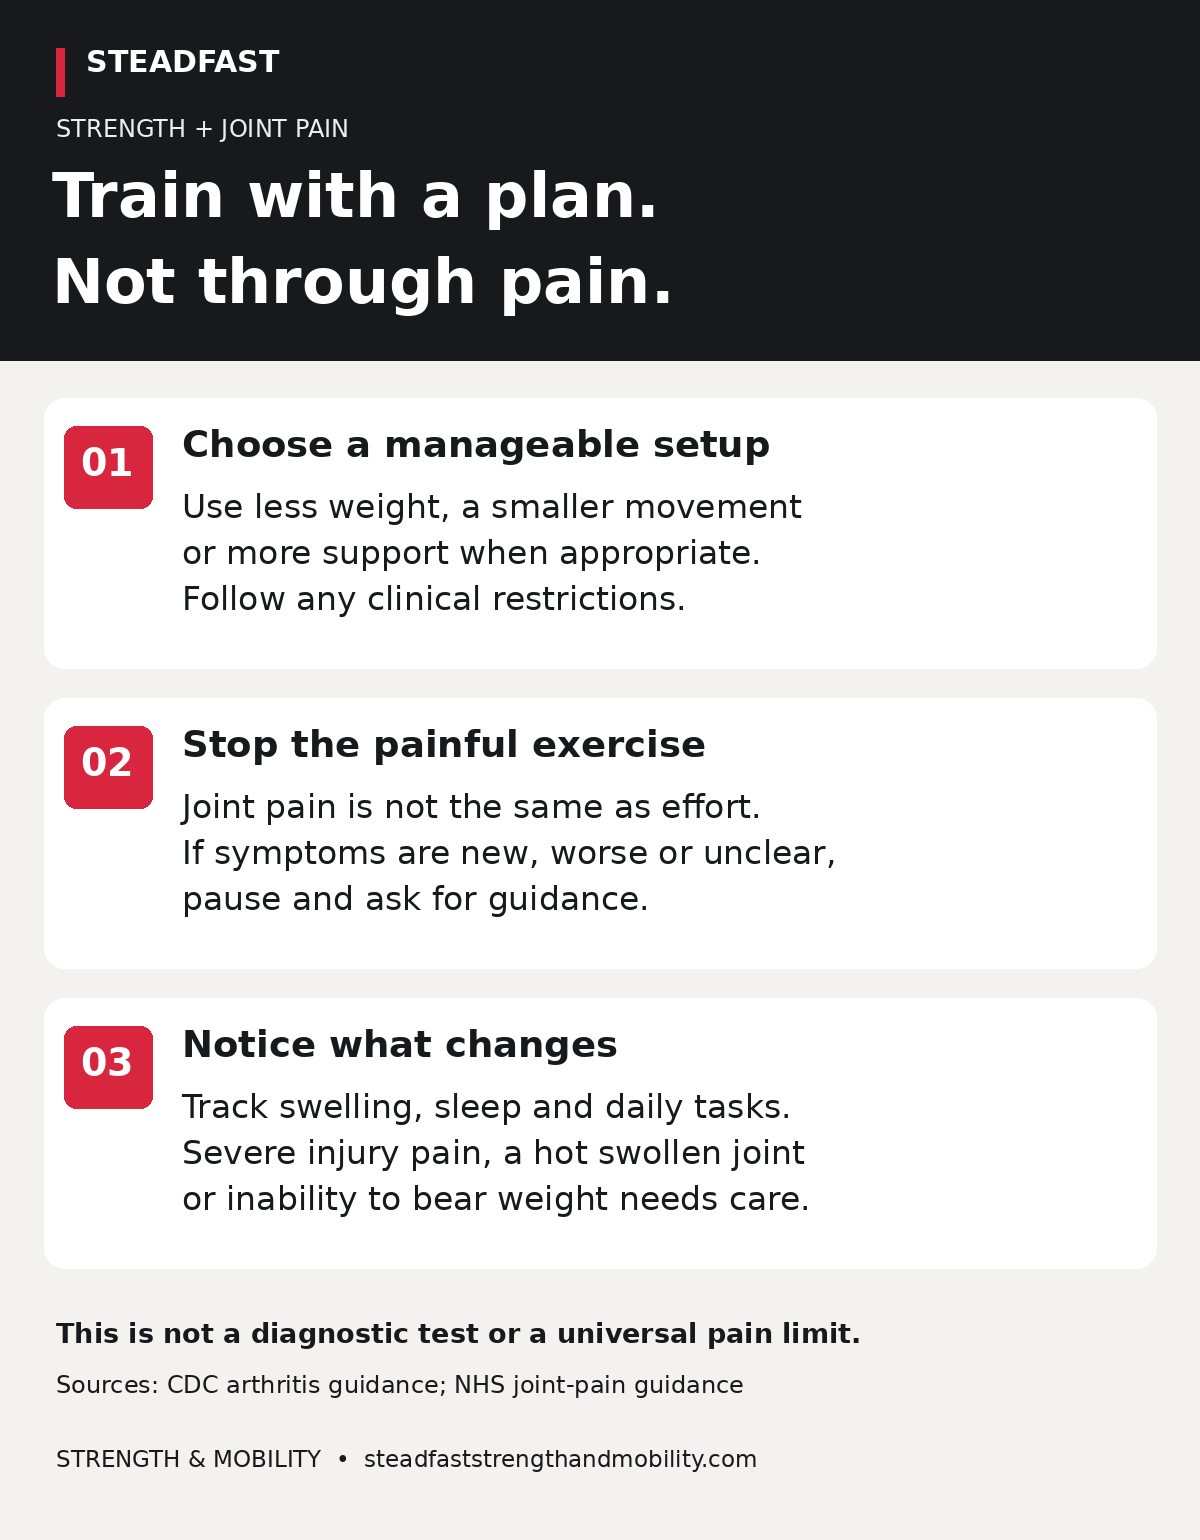
A rule such as “anything below four out of ten is fine” sounds convenient. It cannot account for the cause of your pain, recent surgery, swelling, or a change in what you can do.
When training on your own, choose movements that do not cause joint pain. CDC arthritis guidance recommends weights or bands that do not cause joint pain. Some treatment plans allow a set amount of discomfort. That limit comes from the person’s care team and fits their condition.
Muscle effort and joint pain are different things to report. If you cannot tell what you are feeling, stop the exercise and ask rather than guessing.
Check symptoms during the session, later that day, and the next morning. New swelling, worse sleep, reduced movement, or more difficulty with everyday tasks means you should reduce or pause the exercise causing trouble and ask for guidance.
Do not treat “back to normal within 24 hours” as proof that an exercise was safe. Your care team may give you a different way to track symptoms.
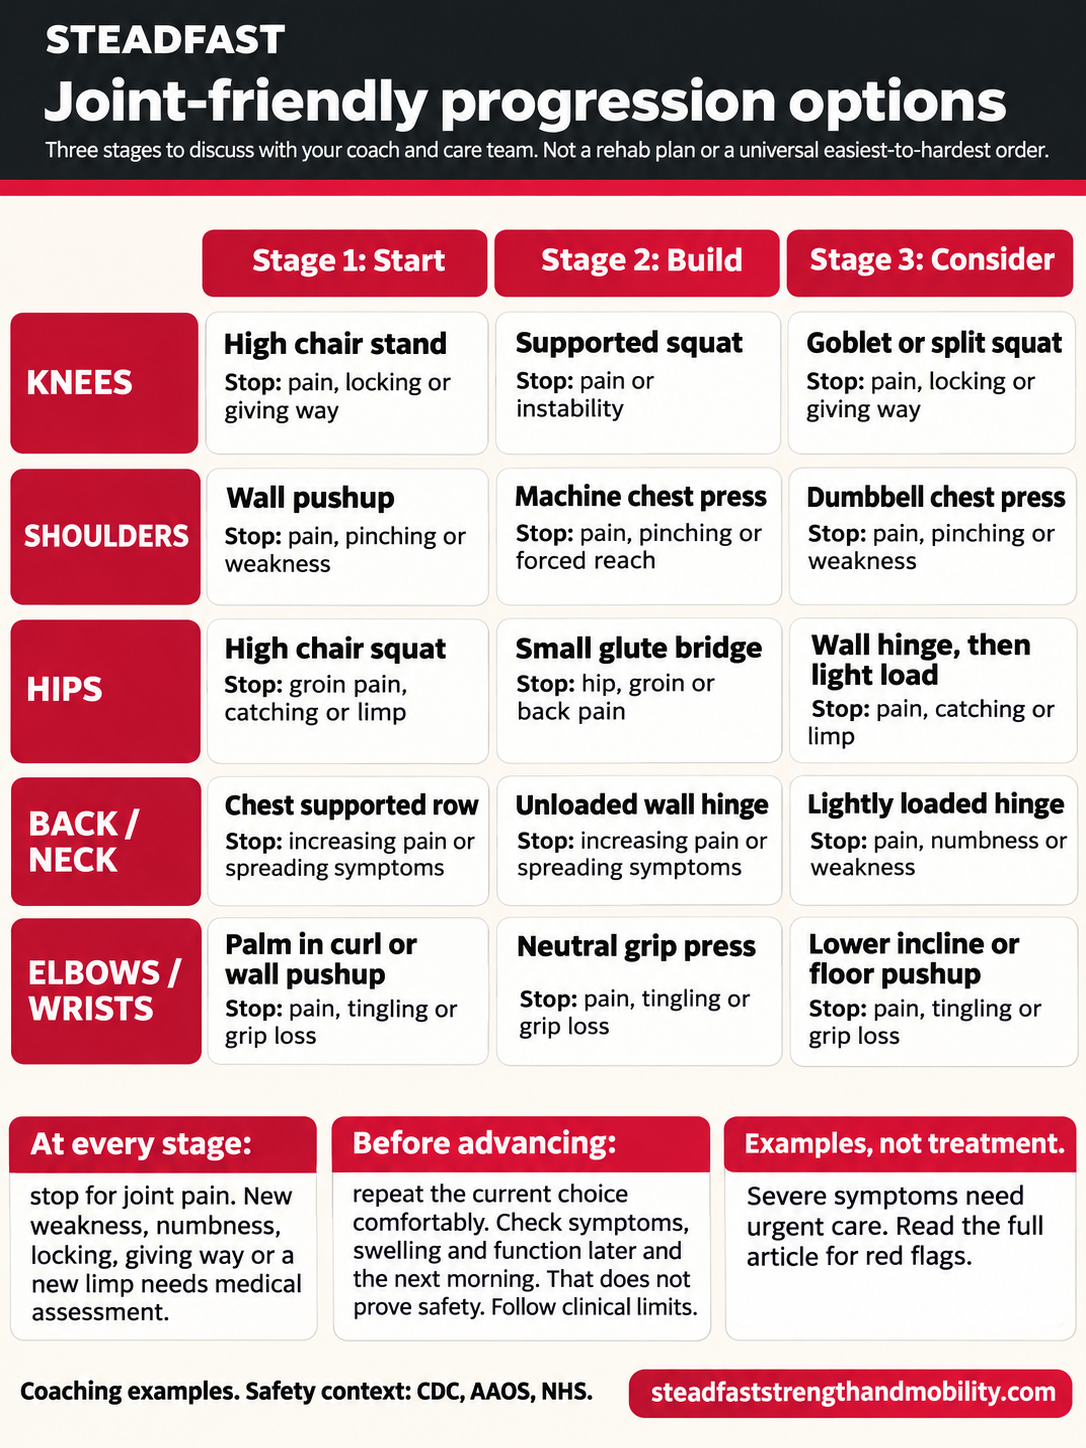
The stages below are options to discuss, not a test to pass or a rehabilitation schedule. Different exercises ask different things of you. A machine press is not automatically easier than a dumbbell press, and a bridge is not simply a harder squat. Your coach and care team can change the order, keep one option, or leave an exercise out. No calendar date requires you to advance.
Knee pain: find a manageable way to train your legs
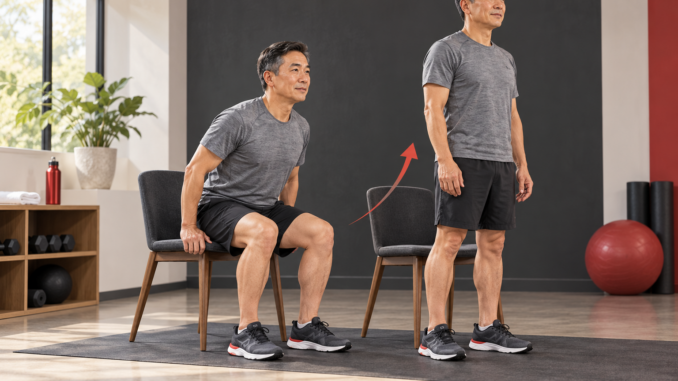
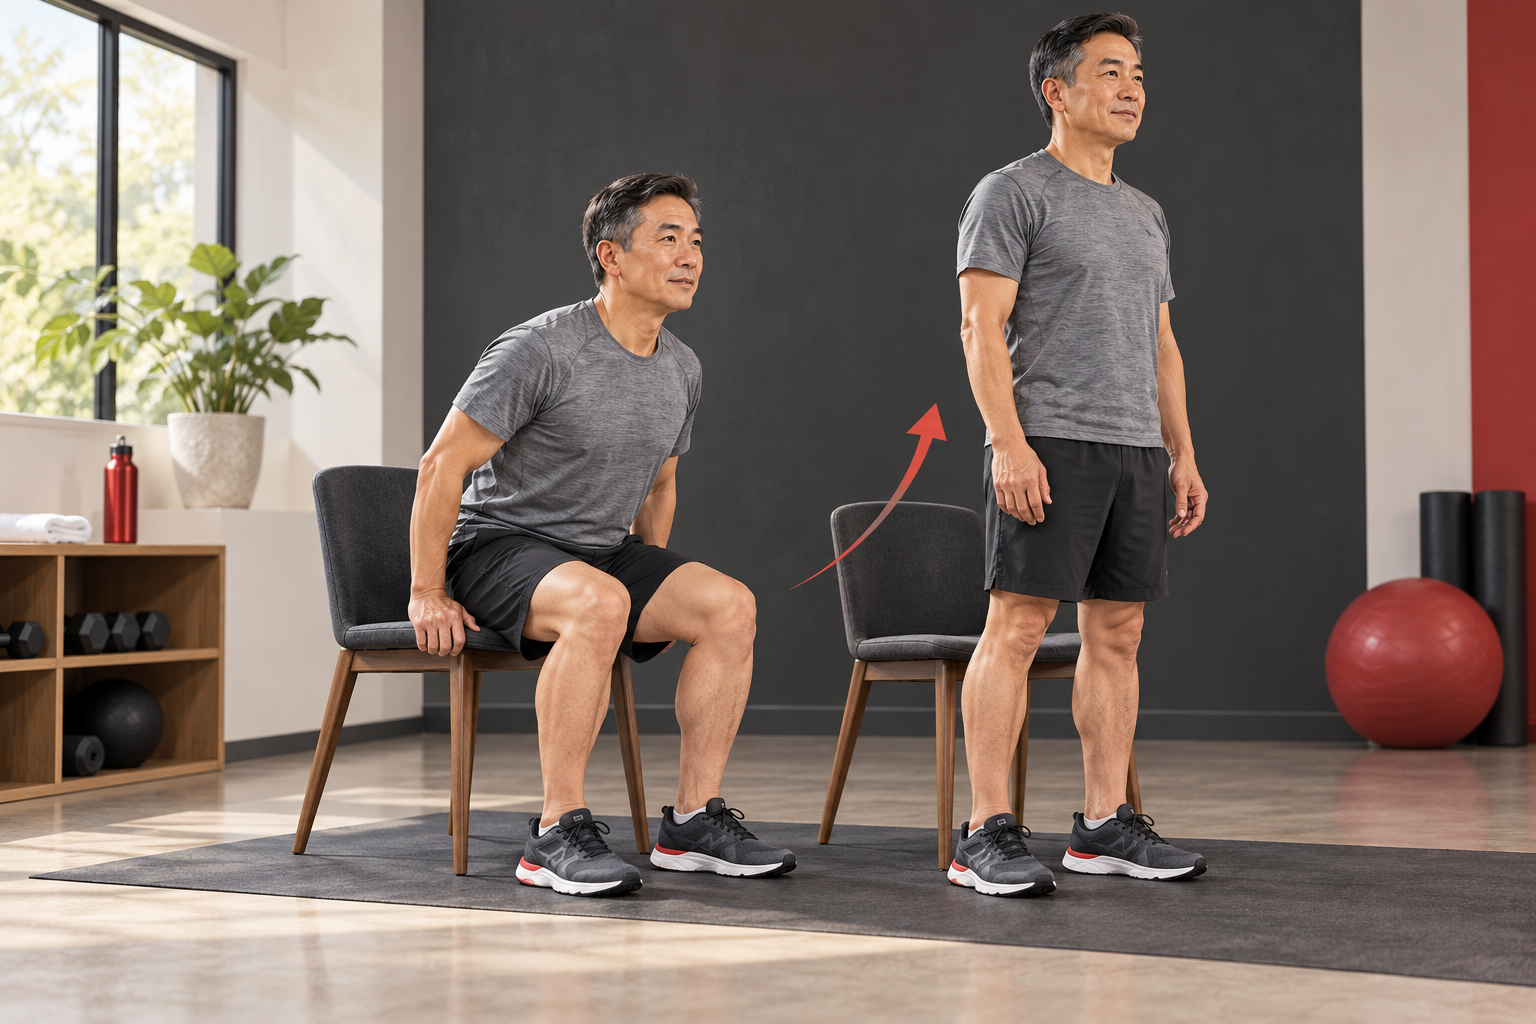
If a squat bothers your knee, one option is a sit-to-stand from a higher, stable chair. Set it against a wall, plant your feet, and stand with control. Use a secure support if needed. Do not drop onto the seat or force a painful depth.
If stairs are comfortable but lunges are not, a low step-up might be worth discussing. Use a fixed step and handrail, place your whole foot on the surface, and lower slowly. Choose a height that does not require a push-off, twist, or painful effort.
Neither option is automatically right for every knee. Stop if pain appears, the knee gives way, or it locks. New swelling or trouble putting weight on that leg needs medical attention, not another exercise swap.
The point is to find a manageable way to train your legs. A smaller movement or added support can be useful without becoming your permanent limit.
Osteoarthritis, a meniscus problem, and patellar tendinopathy are different possible reasons for knee symptoms. Similar pain during a squat does not tell you which one you have. NHS knee guidance describes several possible causes. That is why these choices come with limits rather than one knee routine for everyone.
Three options for building a squat
Stage 1: Start with the higher chair and support described above. Choose a height you can rise from without rocking or dropping back down. Stop for joint pain, locking, or giving way. Repeat this setup before making it lower or heavier.
Stage 2: If that work stays comfortable, discuss a supported squat to a comfortable depth. Hold a fixed rail or other secure support. Keep the movement controlled in both directions. Stop if pain appears, the knee feels unstable, or you need to twist to finish.
Stage 3: A goblet squat, holding one light weight close to your chest, or a supported split squat may be a later choice. In a split squat, keep your feet staggered and use a small comfortable range. These are alternatives, not two required additions. Stop for joint pain, loss of balance, locking, or giving way.
For step ups, begin with a low fixed step and handrail. If the movement stays comfortable, a slightly higher step can be a separate next step. Added weight comes later only if appropriate. Keep the handrail available. At every level, stop for pain, instability, or a push off or twist you cannot control.
Before considering more, you should be able to repeat the current option without joint pain during it, new swelling, or worse everyday function the next morning. These observations help guide a discussion. They do not prove that the knee is uninjured or override clinical restrictions.
Shoulder pain: do not force an overhead position
An overhead press is one way to train. It is not a requirement for every session.
If your care team has cleared pressing exercises, a wall pushup or light chest-press machine may offer a more manageable setup. Keep the wall or machine stable, use a comfortable hand position, and stop before pain or a forced reach. Ask for help setting up the machine. The starting position should not pull your shoulders too far back.
For pulling, a supported row may be an option. In a row, you pull a handle or weight toward your body. Keep your chest supported, avoid jerking the weight, and stop the pull before the shoulder feels pinched. A palm-in grip may feel better for some people; it is not a universal fix.
The AAOS shoulder conditioning program says recovery exercises should be supervised by your care team. It also says not to ignore exercise pain. Sudden weakness after injury needs medical attention, not a harder warm-up.
Frozen shoulder, rotator cuff irritation, and impingement type pain can limit movement in different ways. A press that suits one person may irritate another. Do not use how a movement feels to diagnose your shoulder. NHS shoulder guidance explains why persistent pain or a marked change in movement needs assessment.
Three pressing options, with a separate rowing choice
Stage 1: Use a wall pushup if pressing is allowed. Stand close enough to control the movement, keep your body steady, and choose a comfortable hand position. A chest supported row can be the pulling option. Stop either movement for pain, pinching, or new weakness.
Stage 2: Consider a light machine chest press only after checking its seat and starting position with a coach. Try a comfortable grip and angle rather than forcing the machine’s deepest range. Keep the supported row unchanged while testing the press. Stop for pinching, pain, or a forced reach.
Stage 3: A light dumbbell chest press may let each hand find its own comfortable angle. It also asks you to control two separate weights. Get help with setup and getting the weights into position. A supported one arm row is another possible change, not something to add at the same time. Stop for pain, pinching, or sudden weakness.
Consider a change only when the current setup remains comfortable during repeated sessions and afterward, with no worsening sleep or daily reach. You can stay with the wall or machine. These examples do not reproduce the AAOS rehabilitation program or its exercise doses.
Hip pain: find the depth and foot position that fit you
Do not assume that hip pain means you need a deeper stretch. Forcing a position that pinches can turn a useful session into repeated irritation.
A higher chair squat may let you practice sitting and standing without reaching an uncomfortable depth. Start without added weight. Keep the chair secure and use a stance that feels natural rather than copying somebody else’s foot position.
A small bridge is another possible option when getting onto the floor is comfortable and your care team allows it. Lie on your back with knees bent, press through your feet, and lift only through a comfortable range. Do not chase height by arching your lower back. Stop for hip, groin, or back pain.
If both options bother you, stop testing variations. Get lasting groin pain, a catching feeling, or a new limp checked. After hip surgery, follow your surgical team’s restrictions rather than this general list.
Three hip movement options
Stage 1: Practice the higher chair squat within a comfortable depth. Use support and a natural stance. Stop for groin pain, catching, or a new limp. Those signs call for assessment, not a wider stance or a deeper squat to see what happens.
Stage 2: If floor access is comfortable and the movement is allowed, try the small glute bridge described above. Keep the lift modest and lower with control. Stop for hip, groin, or back pain, or a catching feeling. A bridge trains a different movement; being able to squat does not automatically make it suitable.
Stage 3: Discuss an unloaded wall hinge. Move the hips back a short distance while keeping your balance. Only after that practice stays comfortable should a coach consider a light load and help with its position. Stop for pain, catching, a new limp, or a range you have to force.
Advancing means the current option is repeatable and your usual walking, sitting, and getting up are not worse afterward or the next morning. Keep any surgical limits in place. Comfortable practice is useful feedback, but it cannot explain a painful hip or clear you after surgery.
Back or neck pain: find support without forcing stiffness
Back pain is not something a coach can diagnose by watching one deadlift. NHS guidance notes that its cause is not always obvious.
When a bent-over row is uncomfortable, a chest-supported row may reduce the need to hold that bent-over position. Adjust the pad, keep your neck comfortable, and use a light load without jerking. Stop if symptoms increase or travel into an arm or leg.
A hip hinge means bending at your hips as they move backward. If your care team has cleared this practice, stand near a wall and gently move your hips backward toward it, without weight. Use a small range, keep your balance, and avoid forcing an arch or rounding to reach farther. This is an optional practice, not a test you must pass.
There is no need to hold your spine rigid all day. Choose exercises that fit your symptoms, goals, and any diagnosis. New numbness or weakness needs medical attention; the emergency warning signs appear below.
Three supported starting options for the back
Stage 1: Begin with the chest supported row if it is appropriate for you. Adjust the support so you can breathe and keep your neck comfortable. Stop if pain increases or symptoms travel into an arm or leg. New numbness or weakness needs medical attention.
Stage 2: Consider the small, unloaded wall hinge. Keep the movement slow enough to stop anywhere. Stop for increasing pain, loss of control, or symptoms traveling away from the back. Do not keep changing your spine position to work around numbness or weakness.
Stage 3: A lightly loaded hinge is a separate decision after comfortable practice and steady recovery. A coach can help choose the load and range. Stop for increasing pain, spreading symptoms, numbness, or weakness. A heavier hinge is never required to prove your back is better.
Keep the current option until it is repeatable without worse symptoms later or the next morning. New bladder or bowel changes, numbness around the genitals or anus, or symptoms in both legs require the emergency action described below. Do not wait for the next training session to report them.
Elbows and wrists: change the grip without hiding symptoms
A straight bar locks both hands into one position. Separate handles or light dumbbells may allow a more comfortable grip.
For a curl, where you bend your elbow to lift a weight, try a light palm-in grip only if it is comfortable. Keep the wrist in a natural position, move without swinging, and stop if elbow or wrist pain appears. Lighter weights count. Use them when they help you stay comfortable and in control.
For pressing, a wall pushup may be more manageable than a floor pushup. Place your hands on a secure surface and use only a comfortable wrist angle. Do not improvise with loose objects that could roll or slide.
Tingling, numbness, dropping objects, or a new loss of grip strength needs assessment. A different handle cannot establish why those symptoms are happening.
Three ways to explore grip and support
Stage 1: A light palm in curl and a wall pushup are separate options. Choose only the one that fits your current plan. Keep the wrist comfortable and the support secure. Stop for joint pain, tingling, numbness, or a new loss of grip.
Stage 2: A light press with separate handles and palms facing inward may be an option. Pressing has different demands from curling, so comfortable curls do not clear you for it. Keep the wall pushup if it still suits you. Stop for pain, pinching, tingling, or difficulty holding the handle.
Stage 3: If the wall pushup stays comfortable, a lower fixed surface can increase the challenge. A floor pushup comes only when the wrist angle, load, and getting down and up are comfortable. Stop for pain, tingling, numbness, or grip loss. Skip this change if secure support is unavailable.
Before changing grip, load, or support, check that ordinary tasks such as holding a cup are not getting harder. Dropping objects or new weakness is a reason to get assessed, even if another exercise feels fine.
Three ways to adjust joint-friendly strength training
1. Change the part that needs changing
You can change how far you move, how much weight you use, how many times you repeat the movement, or how much support you have. You can also choose another exercise.
There is no rule that you must shorten the movement before reducing weight.
If the bottom position bothers you, less depth may help. If the whole movement feels too demanding, use less weight or choose another exercise. If symptoms start as you tire, fewer repetitions may help. Stop when a change does not solve the problem.
2. Build gradually from a repeatable session
Progressive overload means gradually doing more as you get stronger and can handle more work. It does not require adding weight every week.
First, repeat a manageable session. Write down the exercise, setup, weight, repetitions, and how you felt. When the work is consistently comfortable and recovery is steady, consider one small change. That might be another repetition or the smallest available weight increase, not both together.
3. Control both directions
The lifting phase is called concentric; the lowering phase is eccentric. Neither is automatically the safer choice for a painful joint.
Use a pace you can control without bouncing or rushing. Do not add slow, exhausting lowering phases just because they sound good for recovery. Exercises meant to treat a diagnosed condition need a plan built for you.
Keep breathing through the effort. Follow any limits your care team has set on your breathing or how hard you work.
Start small and track what happens
If you have been cleared to exercise, two strength days with at least a day off between them can be a useful starting point. Your care team or coach may recommend less at first.
Choose a comfortable leg exercise, a push, and a pull from suitable options. Add other movements only when they fit your needs and restrictions. You do not have to train every sensitive area in the first session.
For example, a coach might start with one or two sets of six to ten controlled repetitions. A repetition, or rep, is one complete movement. A set is a group of reps. Finish while you could still do several more.
These numbers are only an example, not an injury treatment plan. Start with less if needed. Do not hit a target by pushing through joint symptoms.
Rest long enough to regain control and steady breathing. Track how demanding the set felt with an agreed RPE scale. RPE means rating of perceived exertion: how hard the work feels to you. Keep tracking pain separately. An effort score never overrides medical limits.
ACSM’s 2026 resistance-training guidance supports regular training matched to each healthy adult’s needs. It does not provide a treatment plan for joint pain that has not been diagnosed. For broader programming basics, see the Strength Training Over 40 guide.
Two example training weeks
These examples show how a coach might organize a small amount of permitted exercise. They are not treatment plans or complete programs for every muscle. Use only movements already agreed as suitable. Medical or physical therapy instructions take priority, including a lower starting dose or a pause from training.
A two day starter week
Leave at least a day off between strength sessions, for example Monday and Thursday. For each selected movement, the example dose is one or two sets of six to ten controlled reps. Begin with less when needed. Keep the setup, range, and load familiar rather than trying every new variation at once.
Day A, legs and push: choose a higher chair stand or supported squat, then a wall pushup or appropriately adjusted machine chest press. A low step up can replace the squat option if it has already proved comfortable; it is not an extra requirement. Use the agreed dose for each movement.
Day B, hinge and pull: choose unloaded wall hinge practice, or a light hinge only if that stage is appropriate, then a chest supported row. If a hinge is unsuitable, ask your coach whether an allowed bridge fits instead. Do not assume that substitution treats the back or hip problem.
For both days, record RPE using the scale you and your coach agreed on. Write the effort score after the set and record joint symptoms separately. Finish while you could still do several more controlled reps. Rest until your breathing and control are steady before another set. A rep target is never a reason to finish a painful movement.
Growing to three days
Only consider a third session when the existing sessions are comfortable, recovery is steady, and your care team has not limited frequency. One example is Day A on Monday, Day B on Wednesday, and Day A on Friday. The next week can alternate B, A, B. Keep at least a day off between these strength sessions.
Adding that session is already a change in workload. Keep the existing exercise choices, reps, and weights steady while reviewing the response. Later, if a movement is ready to progress, add a rep or use the smallest available weight increase, not both together. There is no requirement to progress each week.
ACSM’s healthy adult guidance does not require everyone to train to muscle failure. It also does not establish these example sets and reps as treatment for painful joints. A coach can adjust the training dose within clinical limits without turning every set into a maximum effort.
Keep one log with the exercise, setup, weight, reps, RPE, and symptoms during the session, later that day, and the next morning. Note changes in sleep or everyday tasks too. If the added session makes recovery or function worse, pause the added work and discuss the response before progressing again.
Better technique can help without explaining every pain
A rushed rep, shaky setup, or sudden jump in training gives a coach something useful to change. It does not prove that “bad form” caused your pain.
Look at the whole situation: training changes, recovery, daily demands, and any medical findings. Make one clear adjustment and review the result.
You should understand the purpose of a cue. “Use the rail so you can control the step” is more useful than telling you that your body is broken or out of alignment.
When to stop and get medical help
Do not finish the workout first.
Seek emergency care for back pain with any of these new symptoms:
- Trouble controlling your bladder or bowels, or difficulty peeing.
- Numbness around the genitals or anus.
- Symptoms in both legs, such as weakness or numbness.
A serious accident, chest pain, or severe trouble breathing also calls for emergency help. In the United States, call 911 when needed. NHS back-pain warning signs explain the nerve-related concerns.
Get prompt medical attention for a hot, swollen joint, especially with fever or feeling unwell. Severe pain after an injury, a visibly deformed joint, or being unable to put weight on a joint means you need care, not exercise experiments. See NHS joint-pain guidance.
Make a medical appointment for pain that keeps returning, disrupts sleep or normal activities, or is getting worse. Bring your training log. It can help explain the pattern, but it cannot diagnose the cause.
Common questions about training around joint pain after 40
Can you build muscle with shoulder pain?
You may be able to train with comfortable movements and work other areas while your care team checks and treats the shoulder. Avoid assuming that a pain-free substitute proves the shoulder needs no care. Progress depends on the condition and the plan.
Is strength training with arthritis over 40 appropriate?
Often, yes. Exercise is part of osteoarthritis care, but arthritis includes different conditions. Ask your care team how your diagnosis, symptoms, and medicines affect the plan. A flare, when symptoms get worse, or a recent procedure may change what you can do.
What are the best joint-friendly exercises over 40?
There is no list that fits everybody. Choose exercises you can control, do comfortably, and gradually build on within your medical limits. Machines, bands, bodyweight, and free weights are tools, not guarantees of safety.
How do I know when to add weight?
Repeat the current setup comfortably first. Check control, symptoms during the exercise, and recovery afterward, including the next morning. If those stay steady and the movement is within your clinical limits, discuss one small change with your coach. You can add a rep before weight, but that order is not a rule. Keep the other variables steady so you can judge the response.
What if only one side hurts?
Tell your coach and care team which side, which movement, and what has changed. Do not force the painful side to match the other side’s range, weight, or reps. The comfortable side does not diagnose the painful one. Separate handles or supported movements may help with setup, but new weakness, numbness, or a loss of function needs assessment.
Should I train through stiffness that eases as I warm up?
Stiffness can ease as you begin moving, but that is not clearance to train through joint symptoms. Follow the plan for your condition and stop an exercise that causes joint pain or concerning symptoms. Check again later and the next morning. Worsening swelling, movement, sleep, or daily function means the session needs review, even if the warm up felt better.
Find your starting point
You do not need to arrive with a perfect squat or an impressive training history.
The assessment is coaching, not medical diagnosis or treatment. If pain needs medical attention first, start there. Then build a training plan around what you can do today.
Book a free Mobility + Strength Assessment. We can discuss your goals, current movement, and a practical next step within any limits your care team has given you.
Enjoy our strength and mobility articles?
Add Steadfast Strength and Mobility as a preferred source on Google to see more of our training advice, educational articles, and practical fitness information.
Or choose Steadfast in Google’s source preferences
Be the first to comment